
Disk Replacement
Replace Disk
Warning
In this LAB environment as we have not physically removed or replaced a disk we will simulate the replacement process with enableDisk, however remember in a real disk replacement scenario, you would choose the replaceDisk option
Instructions
- Login as Admin
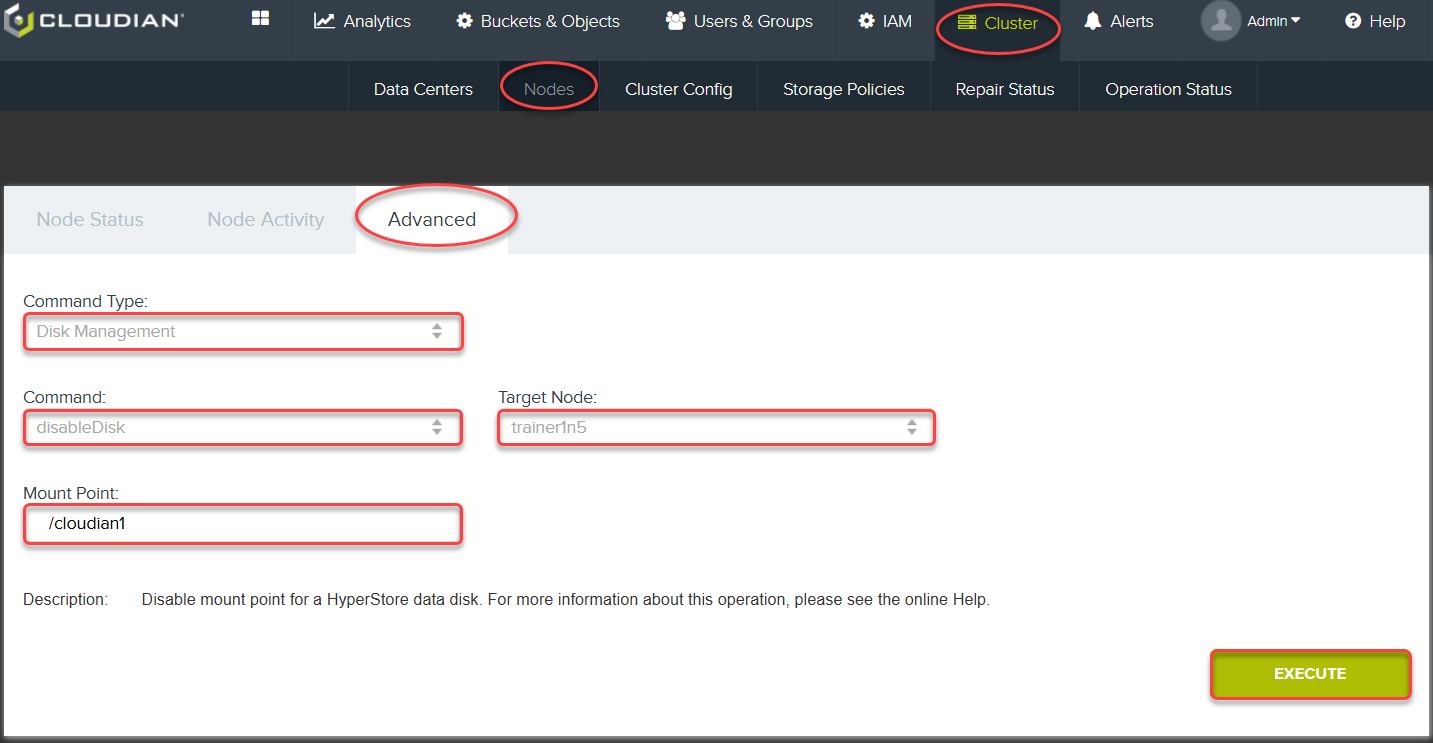
- Click Cluster Tab
- Click Nodes Sub-Tab
- Click Advanced Tab
- Select Command Type: Disk Management
- Select Command disableDisk
- Choose node5 as the target Node
- Type /cloudian1 in Mount Point
- Click Execute
Ensure Result shows disableDisk completed.
Instructions
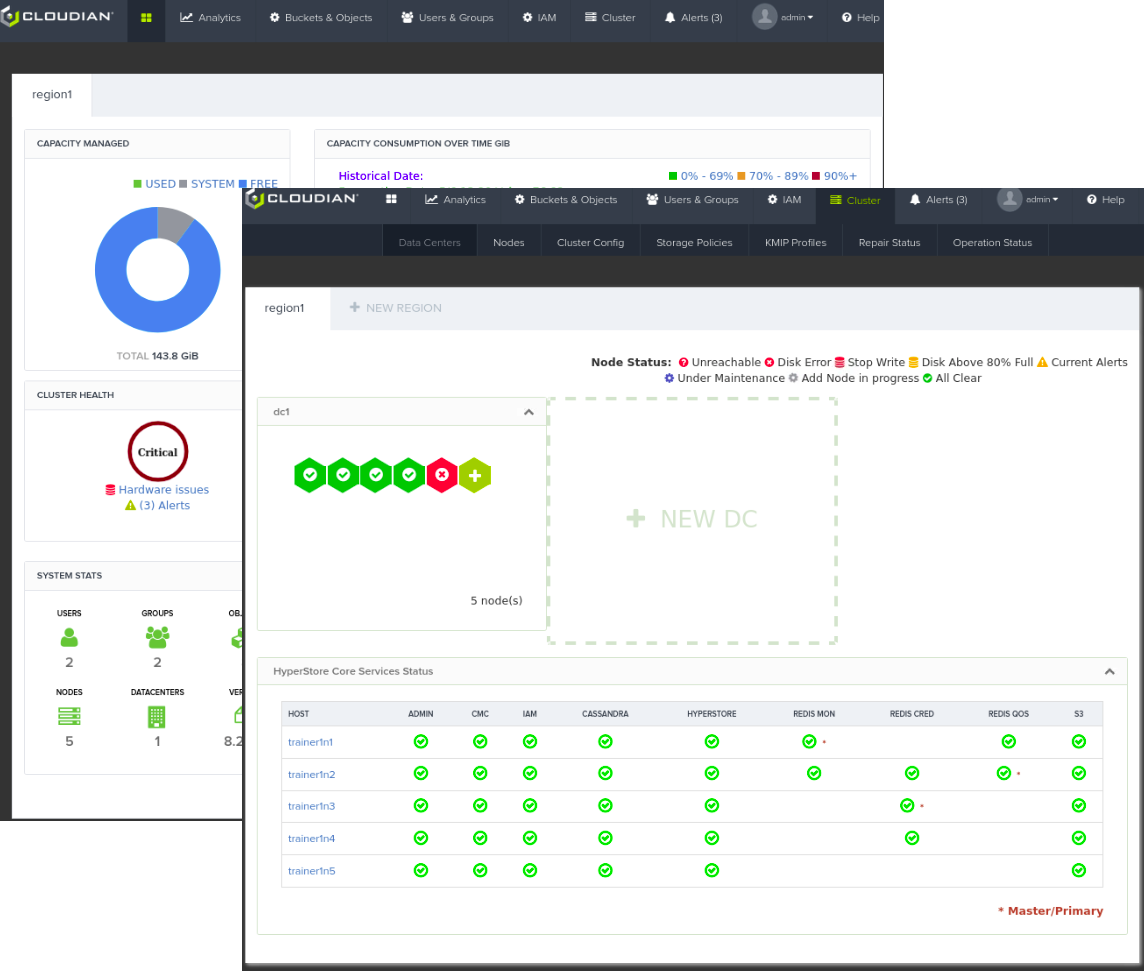
- You may need to wait a few minutes for the CMC to register the disabled disk, however errors will start to show within multiple dashboards.
Instructions
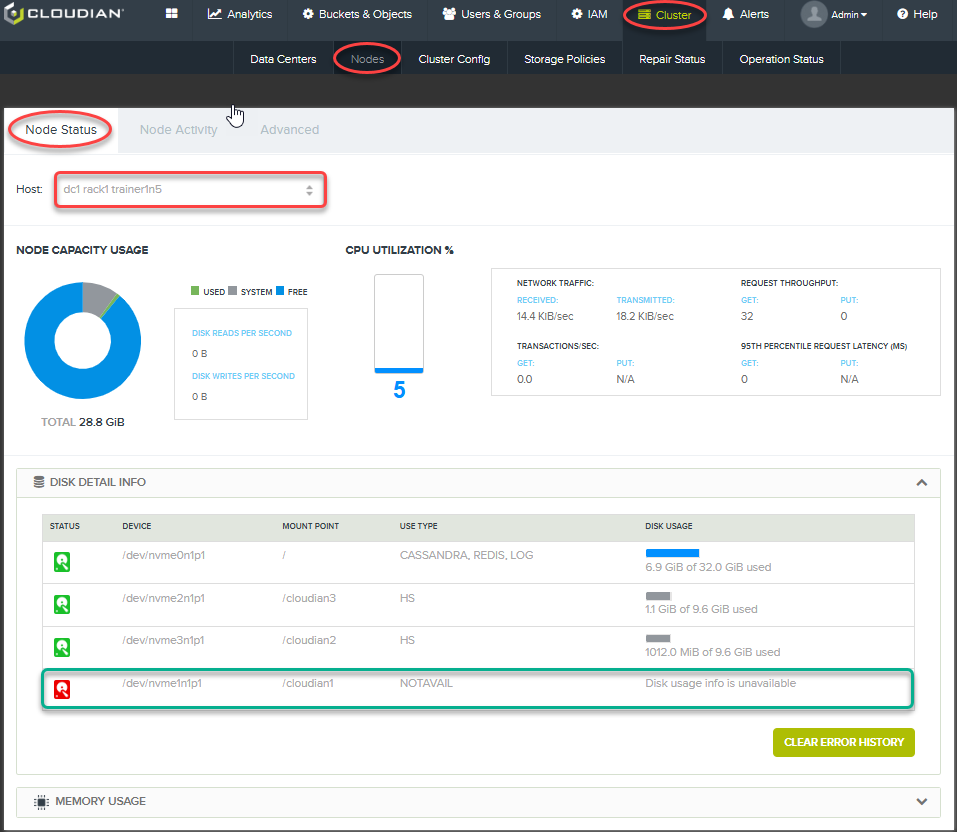
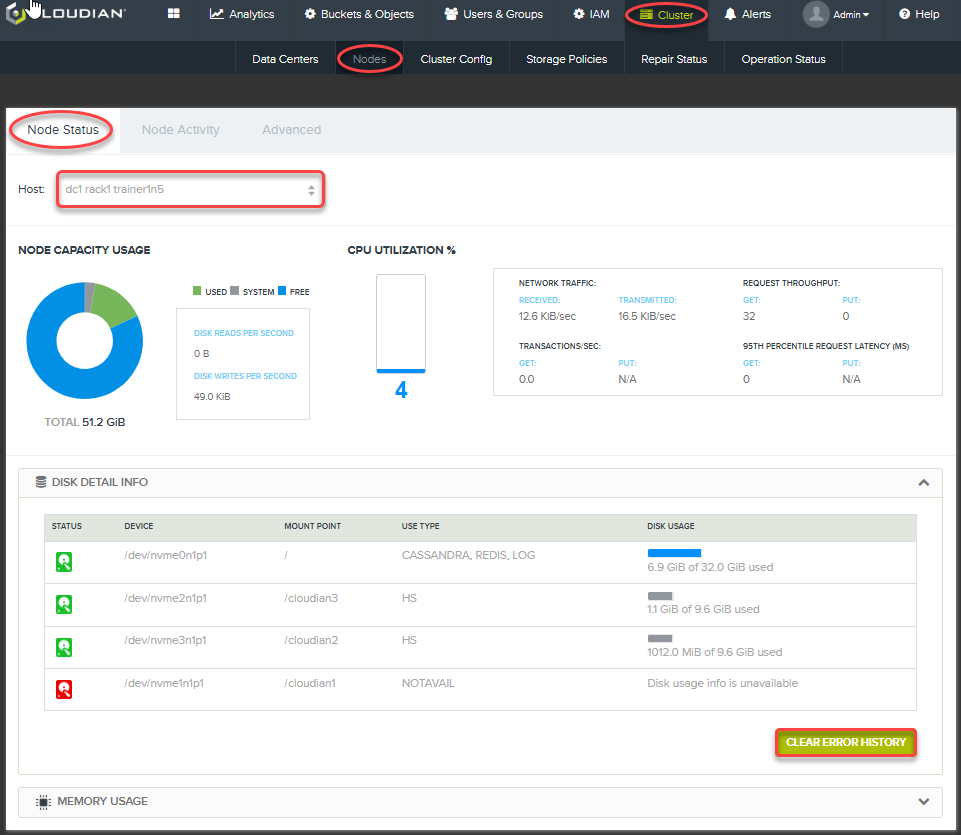
- Check the node directly from the CMC to confirm the disabled disk.
- Click on Cluster Tab
- Click on Nodes Sub-Tab
- Select the node you disabled the disk on under the Host dropdown
- Ensure that the disk is showing as NotAvail
(You may need to refresh screen)
To Activate a Replacement Disk and Restore Data to It
Important
After you’ve physically installed the replacement disk, follow these steps:
Instructions
- Log into the CMC
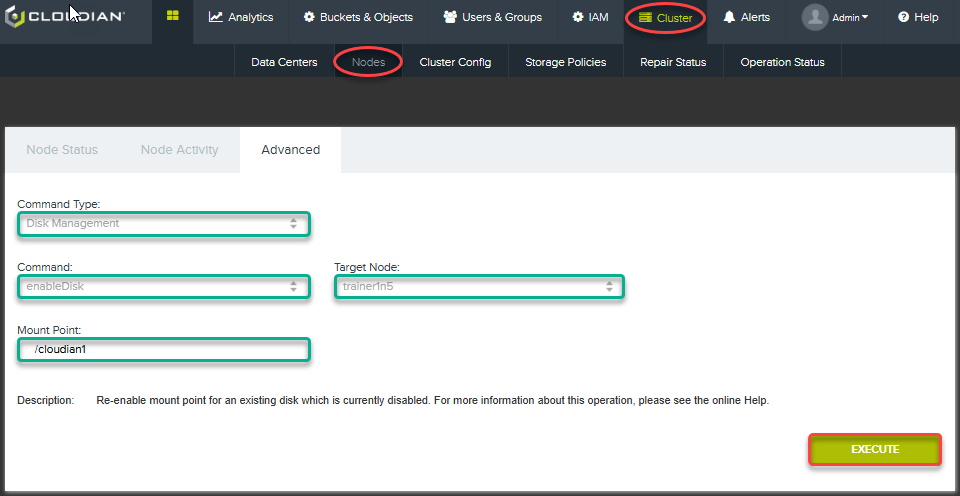
- Select Cluster tab
- Select Nodes sub-tab
- Select Advanced.
- For the Command Type select "Disk Management"
- For the Command select “enableDisk". (In a true disk failure scenario you would need to use the “replaceDisk” option)
- Choose the Target Node (the node on which the disk resides)
- Enter the Mount Point of the replacement disk. This must be the same as the mount point of the disk that you disabled (/cloudian1).
- Click Execute.
Wait some time for the operation to complete. The disk replacement operation automatically invokes a repair on the mount point (to recreate on the new disk the same set of S3 object data that was on the disk you replaced). The duration of this repair operation will depend on how much data is involved.
Instructions
- Select Cluster tab
- Select Nodes sub-tab
Info
In the "Disk Detail Info" section, the replacement disk should have a green status icon (indicating that its status is OK): and the operation is done. It may be necessary to click "Clear Error History" to clear the red error indicator.

Instructions
- if the disk does not reset to healthy in the CMC, it may be necessary to restart the monitoring agent to speed up the process.
systemctl restart cloudian-agent
Repair System
Info
- When you physically install a new disk and then execute the HyperStore replaceDisk function, the system automatically does the following:
- Creates a primary partition and an ext4 file system on the new disk
- Establishes appropriate permissions on the mount
- Remounts the new disk (using the same mount point that the prior disk had), uncomments its entry in /etc/fstab, and marks the disk as available for HyperStore reads and writes
- Moves back to the new disk the same set of storage tokens that were automatically moved away from the prior disk when it was disabled
- Performs a data repair for the new disk (populating the new disk with its correct inventory of object replicas and/or erasure coded object fragments)
Warning
Although the HyperStore system has automatically repaired the disk and associated data we should never rely soley on automated processes and must understand how to trigger a repair manually. Whenever we know an issue has occured and been corrected we should consider manually running a repair process especially if adding nodes or performing a rebalance process at the time of failure.
Instructions
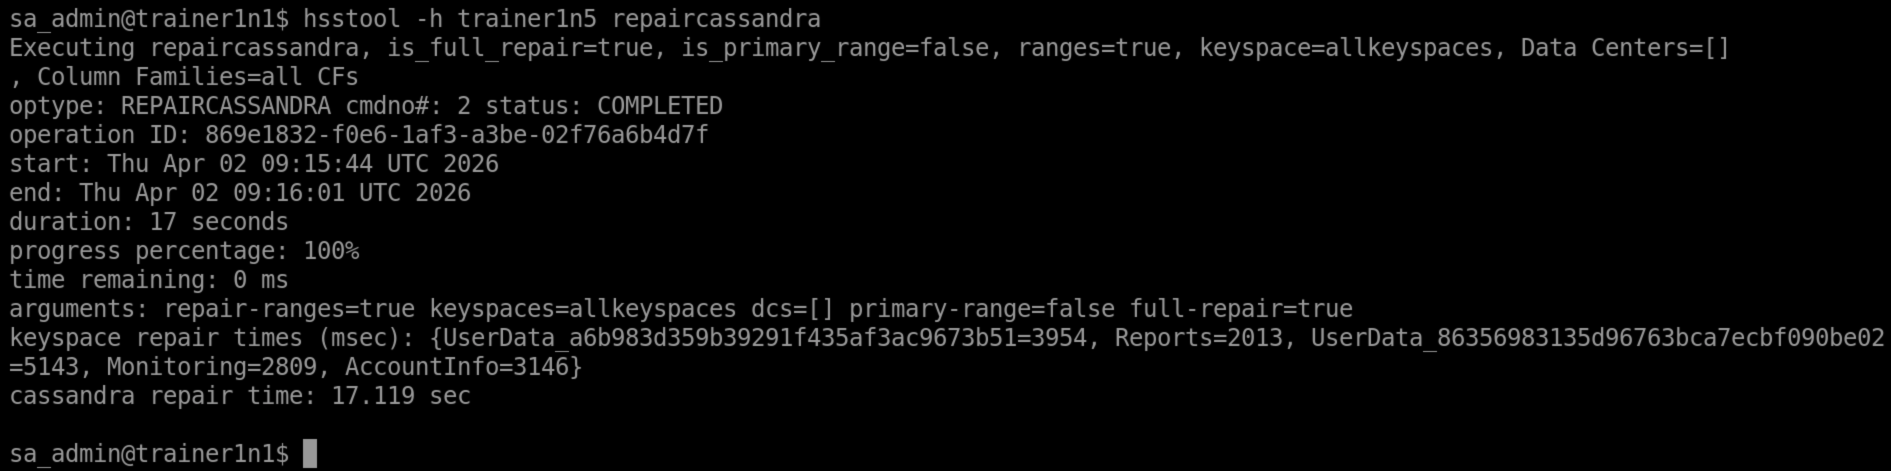
- We will start with Cassandra, log into your system using the sa_admin account
- Start a repaircassandra this will repair all the Cassandra keyspaces.
Remember to modify the command to match your own system
hsstool -h studentXn5 repaircassandra
Instructions
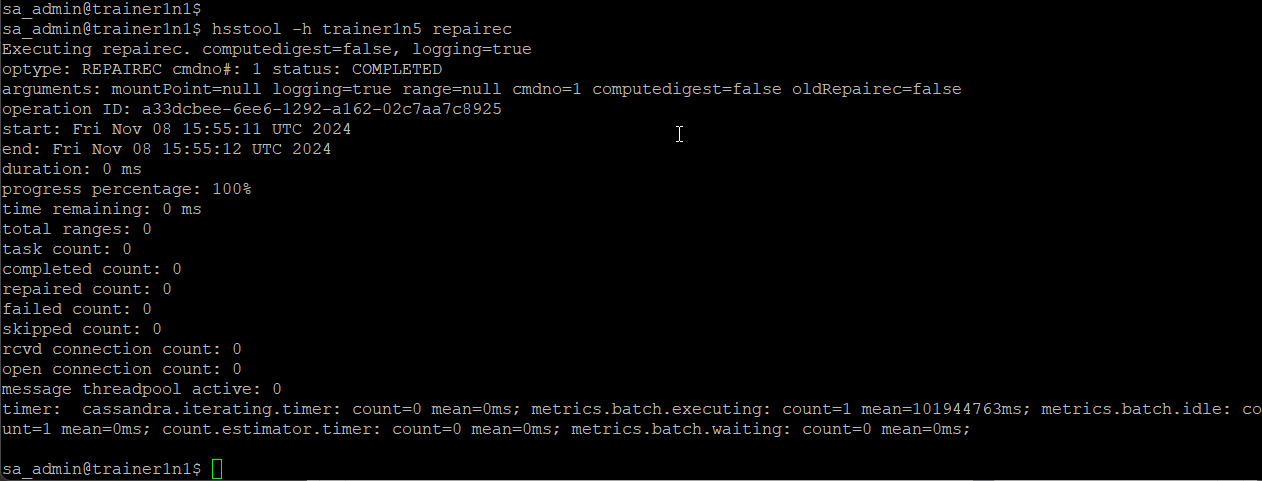
- Next let us repair our erasure coded fragments, if you have logged out, log into your system using the sa_admin account
- Start the repair process
hsstool -h studentXn5 repairec - Again, the repair in the labs will only take a few seconds to complete.
Instructions
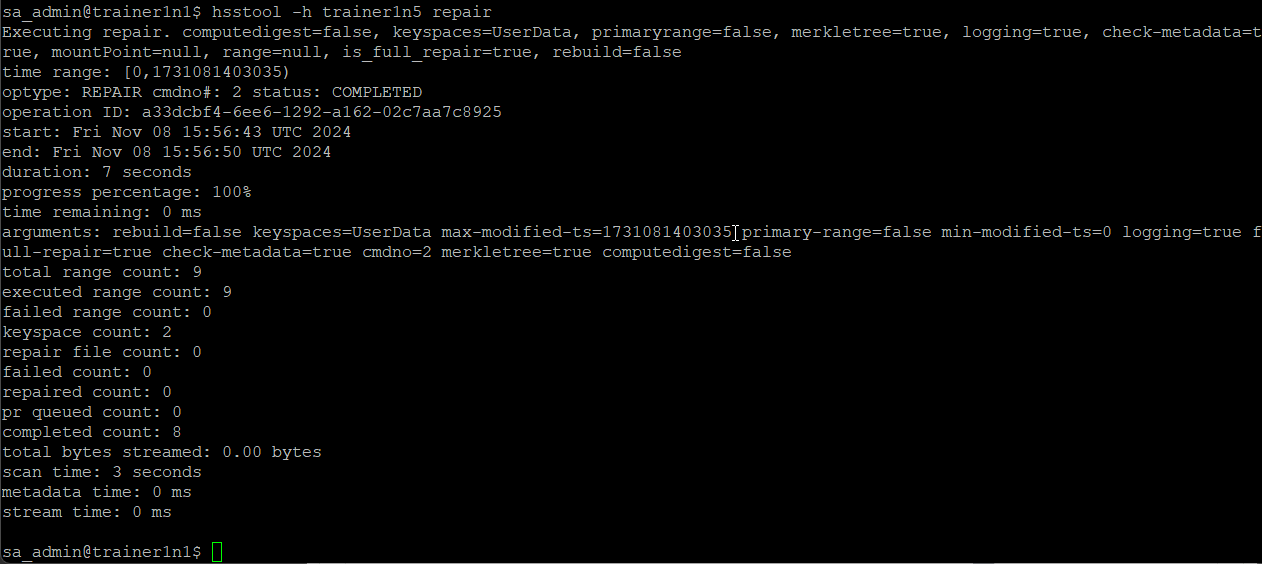
- Finally let us repair our replicas. If you have logged out, log into your system using the sa_admin account
- Start the repair process
hsstool -h studentXn5 repair - On completion fully log out of the sa_admin session using the exit command
exit