
2. Login / Group / User
2.1 Logging In
Point your browser to https://cmc.studentX.cloudian.tech:8443/Cloudian
Where X is your student number.
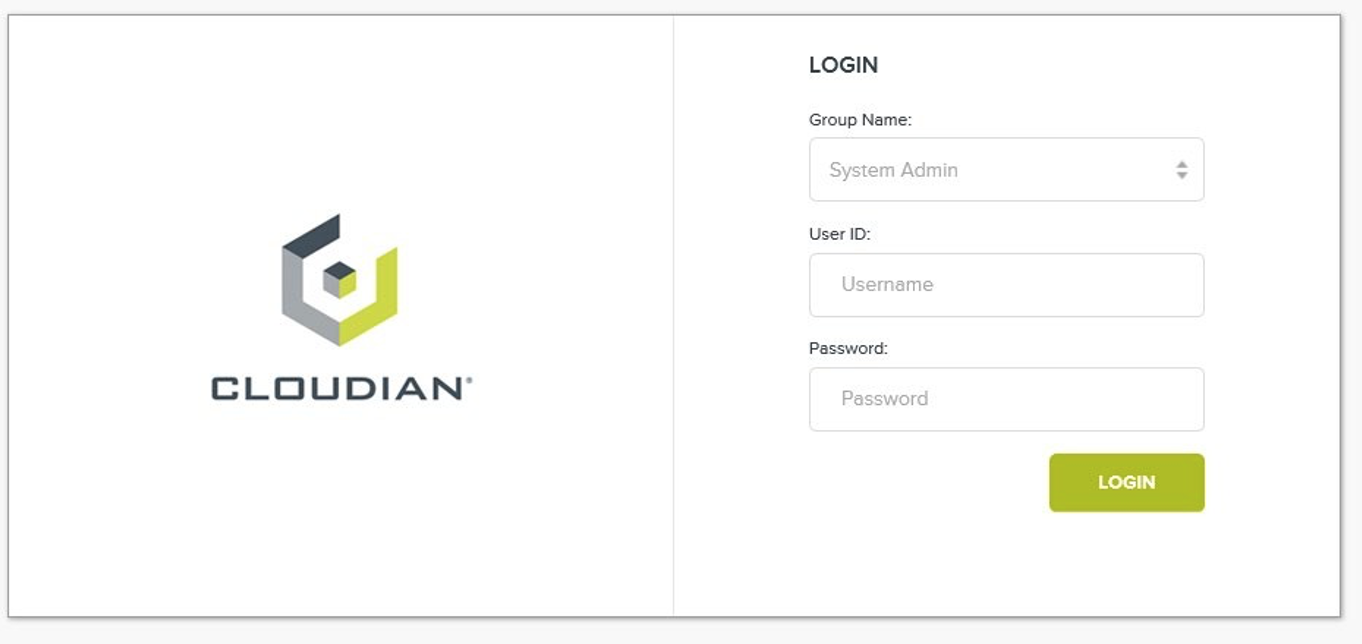
Instructions
- You will get a security warning as we have not configured SSL yet.
- select Advanced
- With the extended information now visible, select Accept the Risk and Continue
- In the newly opened window enter the following data:-
Group Name: System Admin
UserId: admin
Password: public
- The system will force a password update to continue.
2.2 Update Password
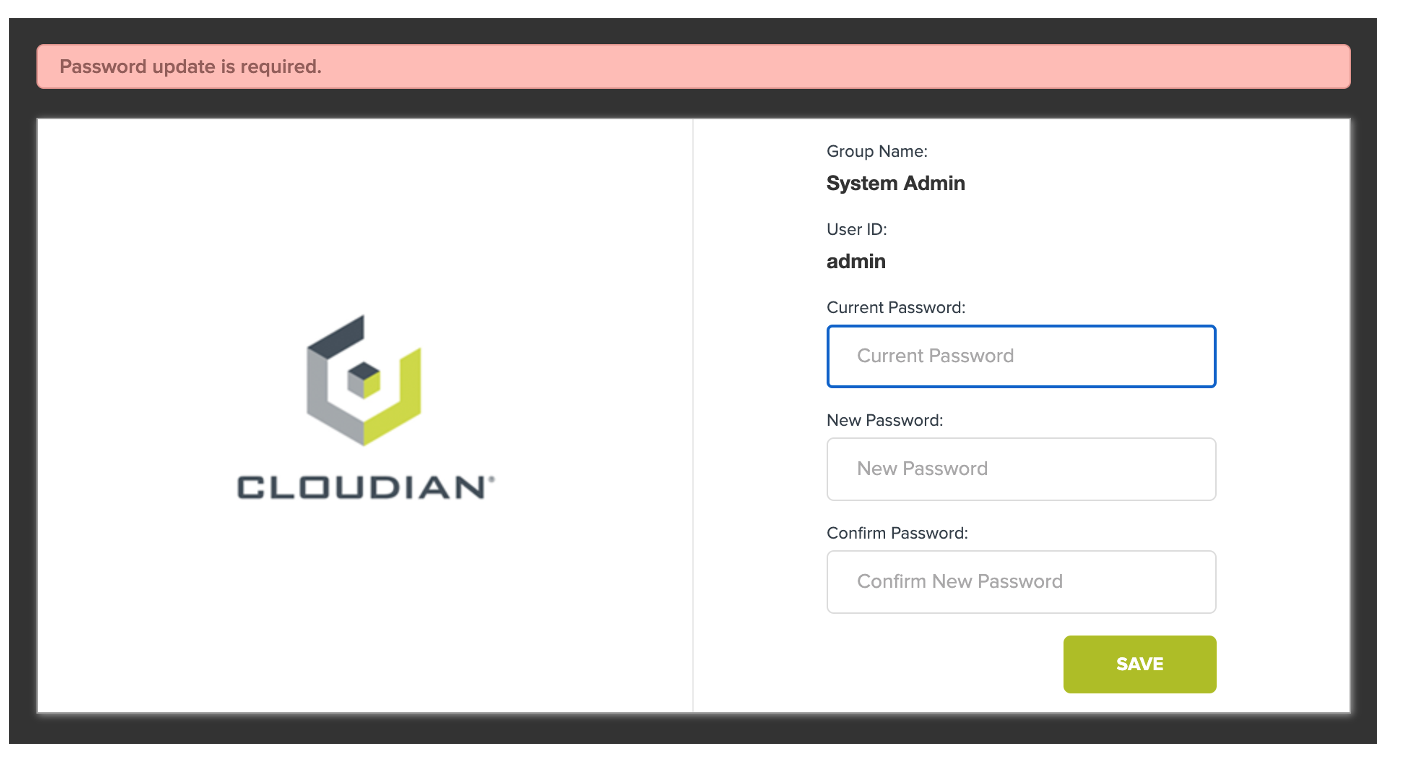
Instructions
- Enter current Password (public)
- Enter New Password / Use @StudentX as new password, where X is your student number.
- If your new passwords do not match or do not meet the requirements then a small ! in a red corcle will be displayed.
- Click Save
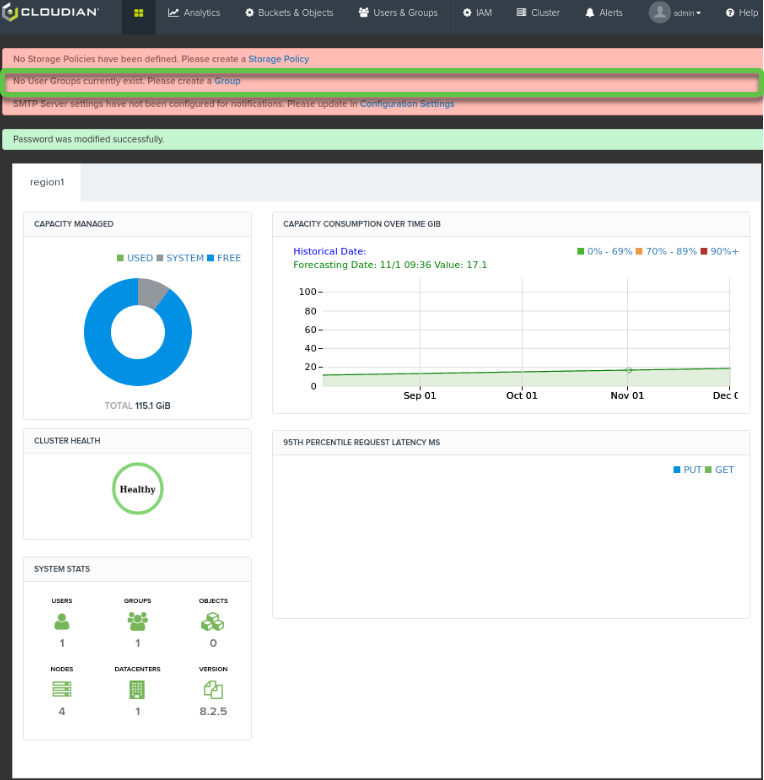
Instructions
- The screen will refresh and identify the password change was successful.
- We have warnings about missing configuration. We must start by adding a User Group
2.3 Add Users Group
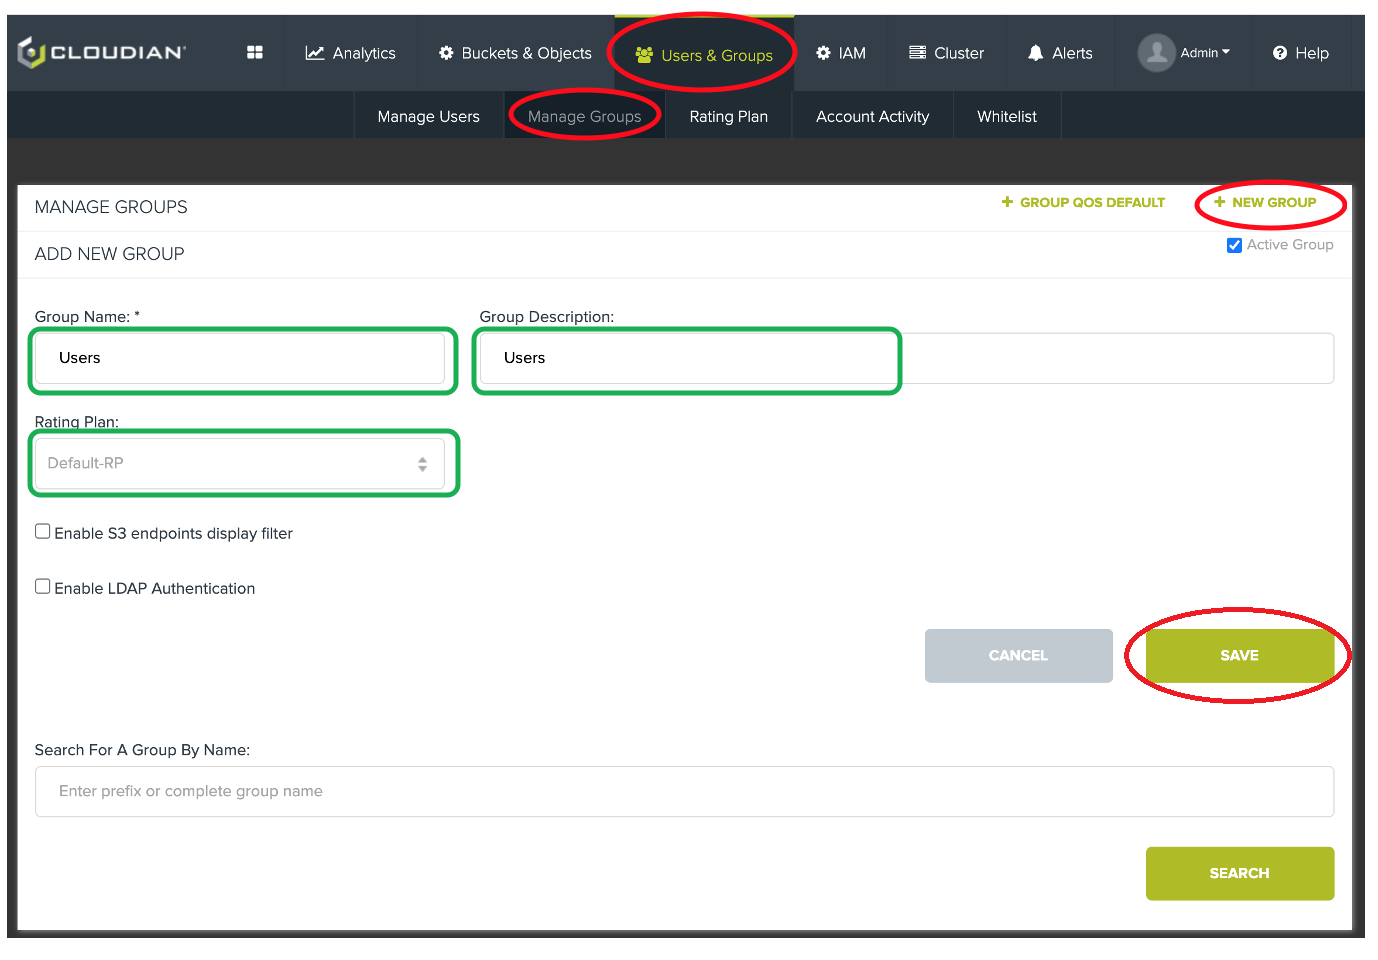
Instructions
- Select Users & Groups Tab
- Select Manage Groups Sub-tab
- Click on + NEW GROUP
- Enter Group Name “Users”
- Enter a Description
- Choose Default-RP from dropdown
- Click Save
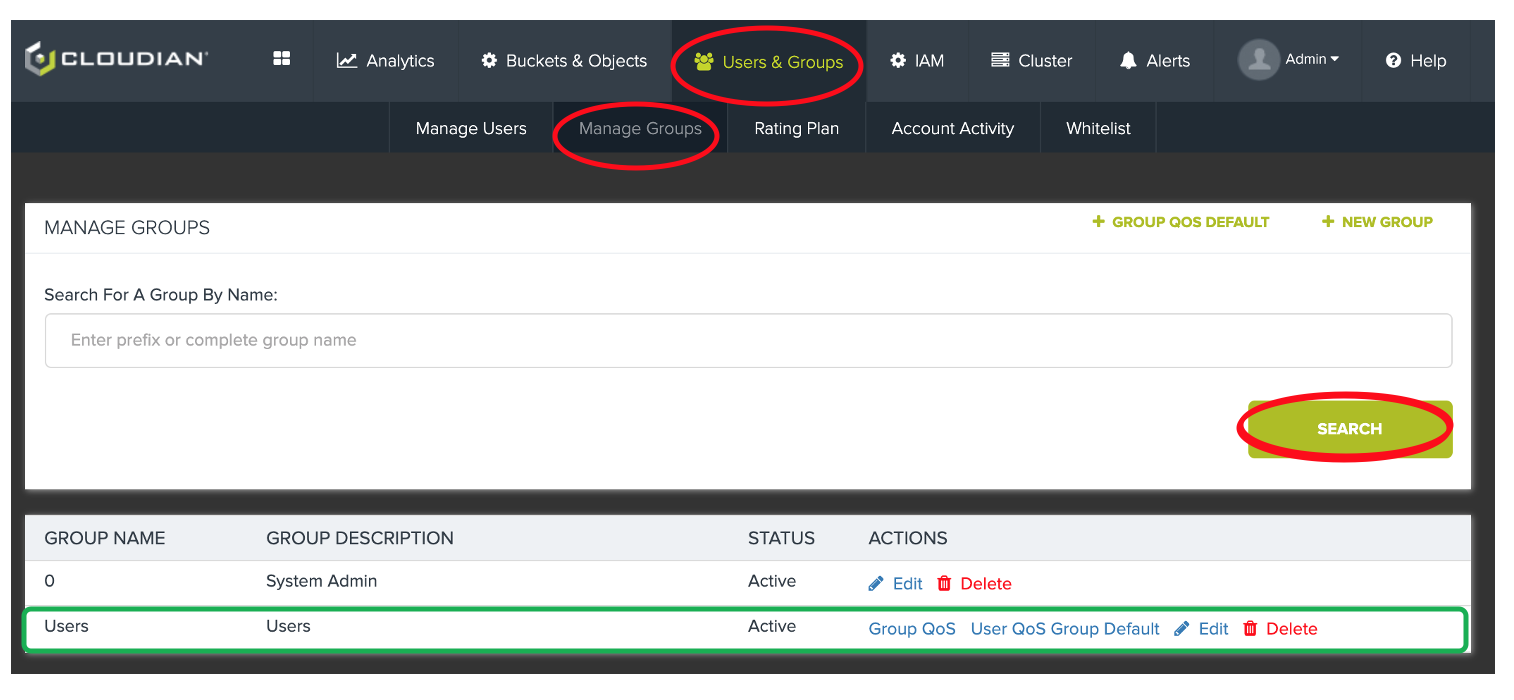
Instructions
- Confirm Group Creation
- Click Users & Groups
- Click Manage Groups
- Click Search
- Ensure Users Group is displayed
2.4 Create new user
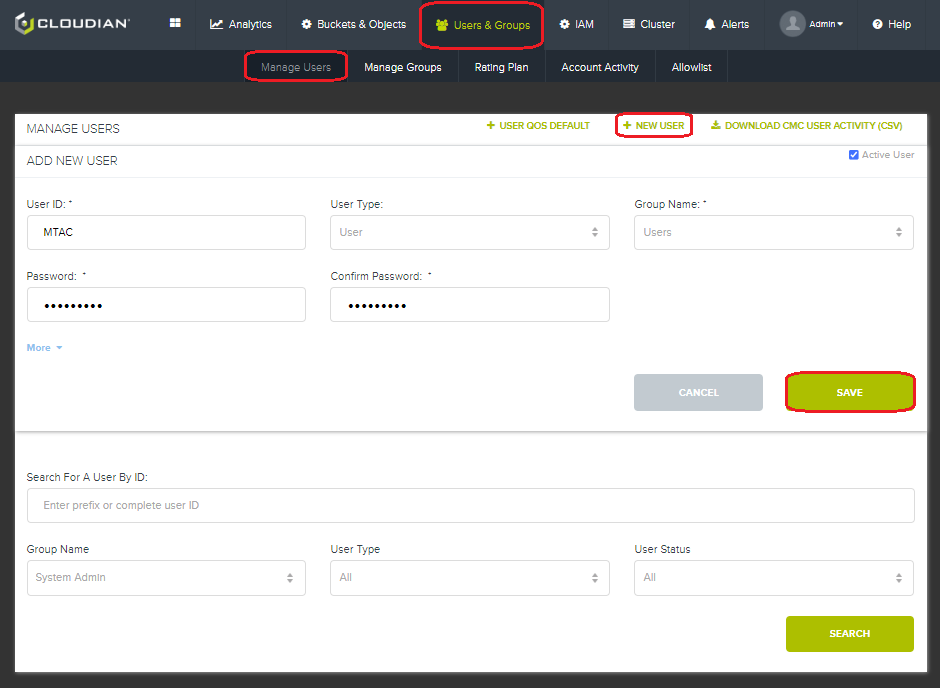
Instructions
- Select Users & Groups
- Select Manage Users
- Click on New User
- Enter your name in User ID
- Select “Users” in Group Name
- Type Password and Confirm
- Click Save
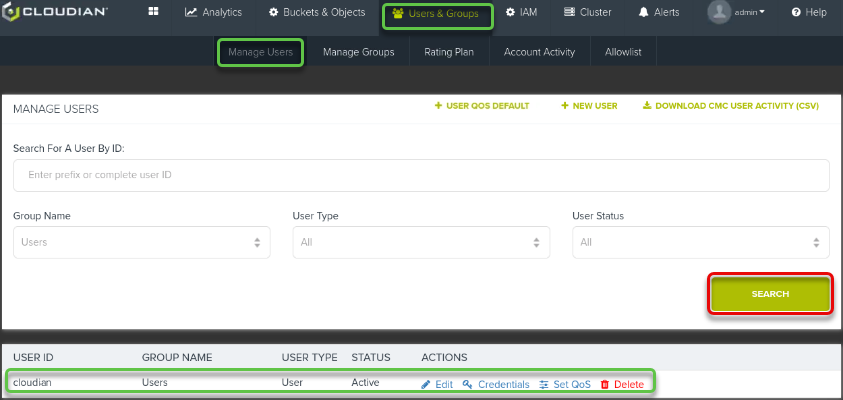
Instructions
- Confirm User Creation
- Click Users & Groups
- Click Manage Users
- Click Search
- Ensure User cloudian is displayed
2.5 Update License
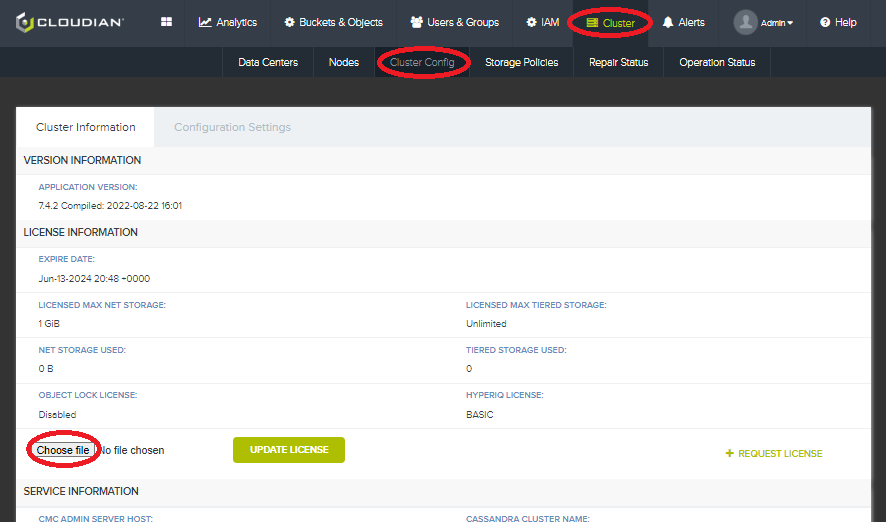
Instructions
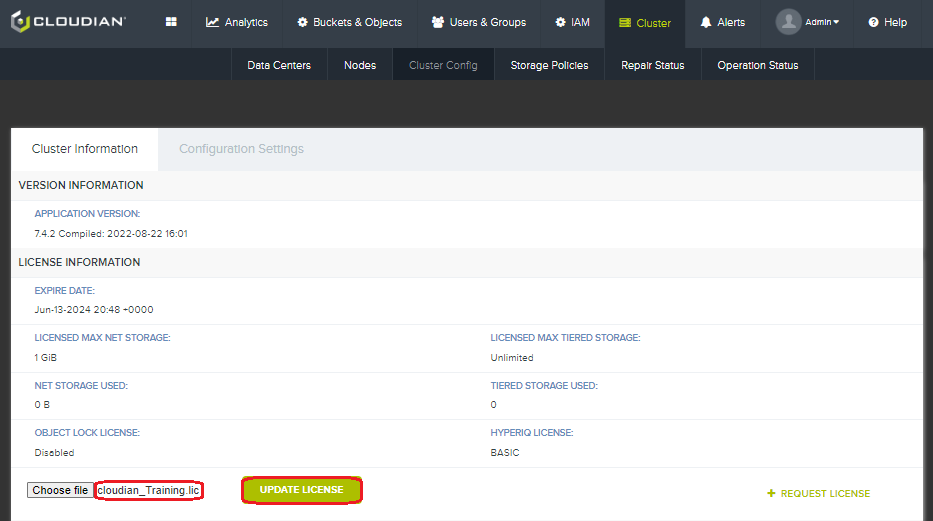
- Select Cluster – Cluster Config
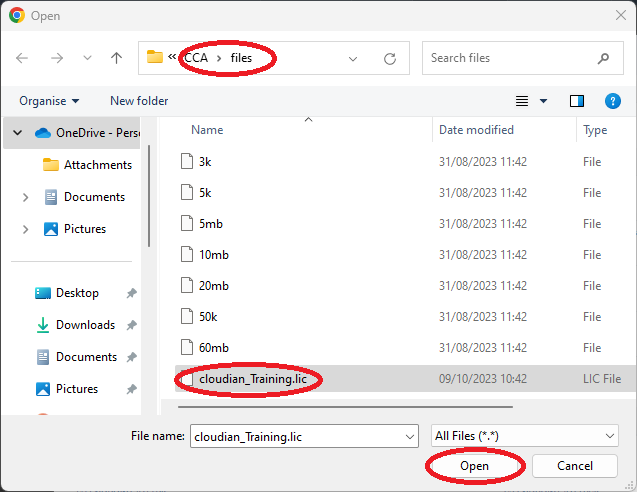
- Click Choose File
- Navigate to new cloudian_Training.lic file from your local machine
- Click Open
- Click UPDATE LICENSE
- A message tells us Please restart Admin service and log in again to see the updated license info on the CMC
The restart also ensures the licence is correcly enforced across all nodes. We will restart the service in a later module to optimize our time.
Info
Note that updating the license uses the 'cloudianInstall.sh' script to propagate the changes to all nodes in the cluster. If you happen to have the script running in a terminal, the process will fail. Exit out of the script and try again.
2.6 Setup HyperStore Shell
In the upcoming labs, we will be using a HyperStore Shell account to manage configuration. This is the recommended way to complete most CLI based configuration on the HyperStore. For this reason, we need to enable the HyperStore Shell.
Instructions
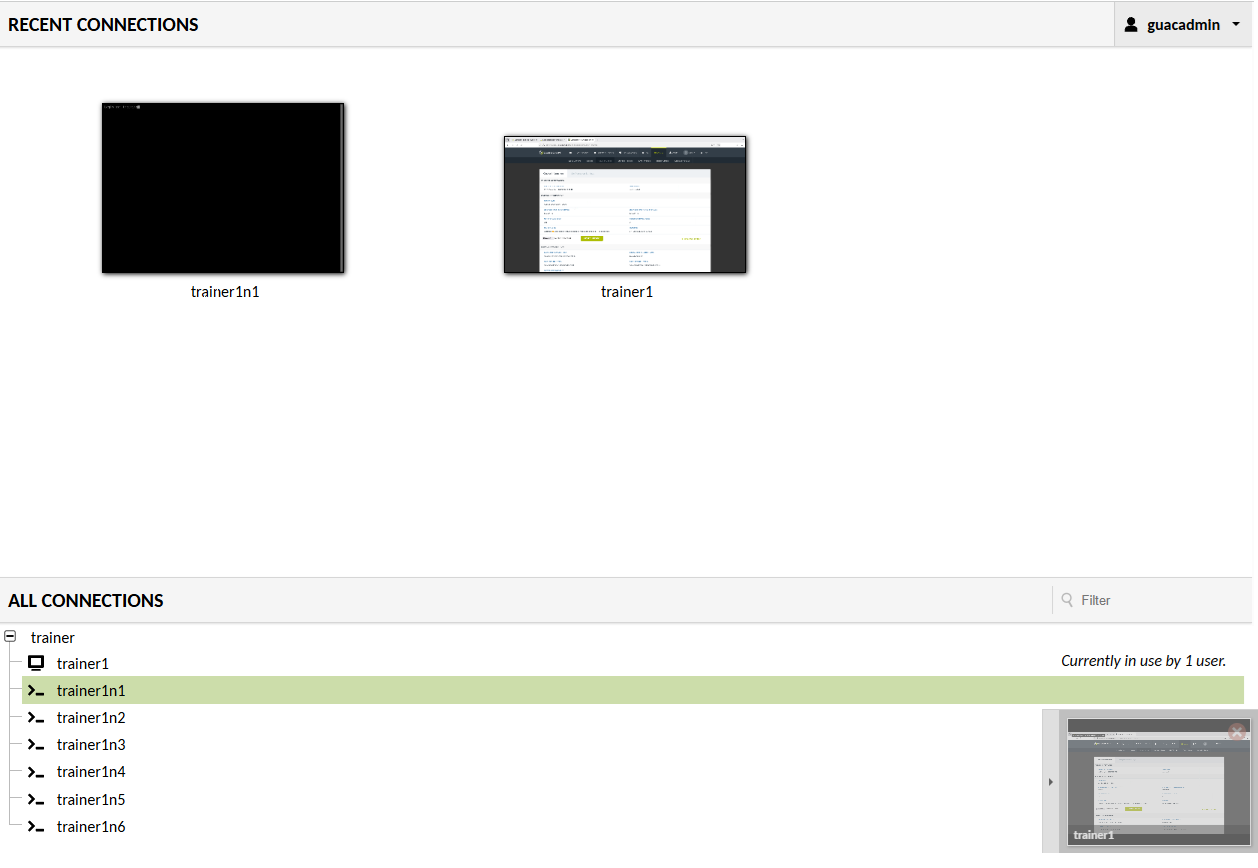
- We need to open an ssh session within the bastion interface
- Using the back arrow on your local web browser, return to the main bastion panel and select your connection to studentXn1 - where X is your student ID
- This opens a ssh session to your node 1
Instructions
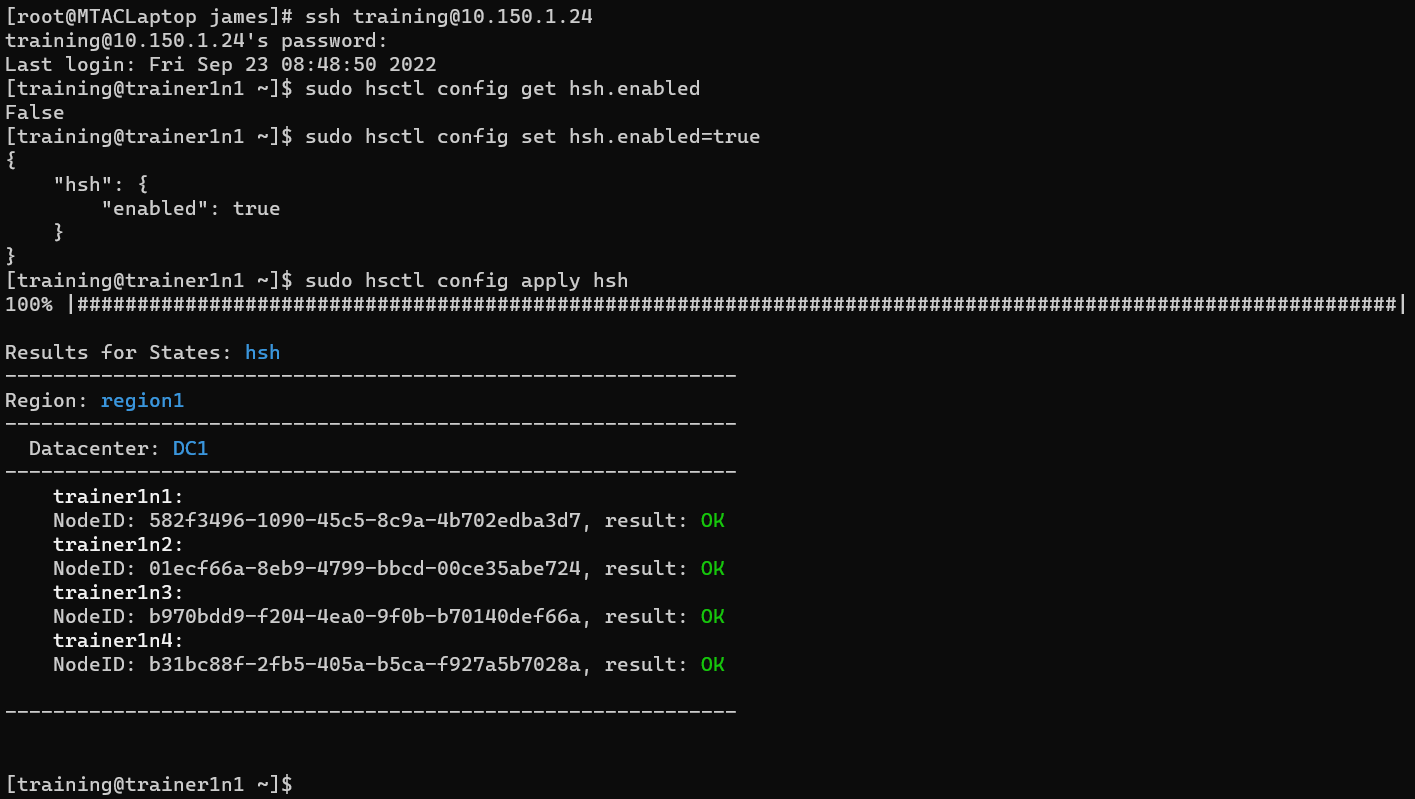
- Log into the Config Controller Node using the root account. Refer to the Student Assignment sheet provided by your trainer for the password
- Check the status of HyperStore Shell by running
hsctl config get hsh.enabled - Enable HSH by running
hsctl config set hsh.enabled=true - Apply the new config to all nodes in the cluster
hsctl config apply hsh - Before we exit from the ssh session - we still need to restart the admin service to fully commit the new license to the cluster. The s3 service and the admin service are linked so we will restart the s3 service which causes a restart of the admin service.
hsctl service restart s3 --nodes=all - On completion exit from the ssh session - you will nned to wait for up to 60 seconds for the session to reset on the back end before another ssh session can be started.
exit